


Creating a professional home photo studio is one of the smartest moves for photographers, content creators, and small business owners who want control over their projects.
It saves money, eliminates rental fees, and gives complete freedom to experiment creatively.
A home setup doesn’t need to be expensive; with clever use of everyday items and small investments, anyone can achieve studio-quality results.
A compact and cost-effective setup can easily rival professional studios if planned with care.
Choosing the Right Space
A spare room, a quiet corner of a bedroom, or even part of a living room can be transformed into a fully functional photo studio.
An important consideration is distance between the subject and camera; for example, a 50mm lens needs enough room for proper framing and background separation.
Natural light sources such as windows provide excellent free lighting during the day. Positioning your shooting area near one allows for flexibility in different lighting conditions.
If working with models, setting up a small area with a curtain or divider for outfit changes adds professionalism. Minimal clutter and neutral wall colors will make lighting adjustments and backdrop installation easier.
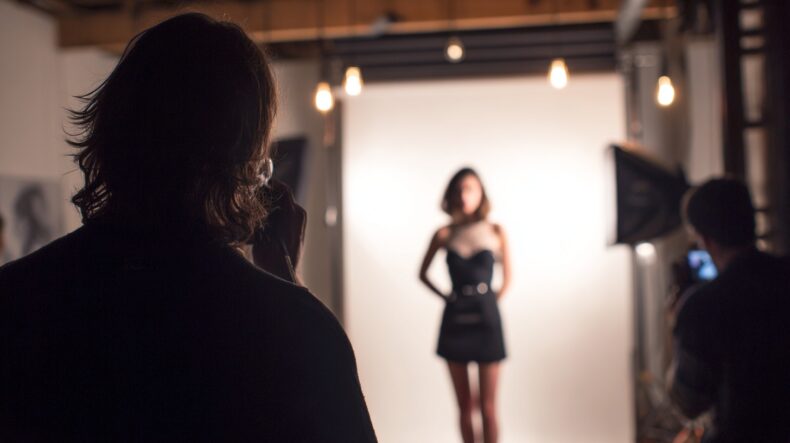
Setting Up Backdrops on a Budget
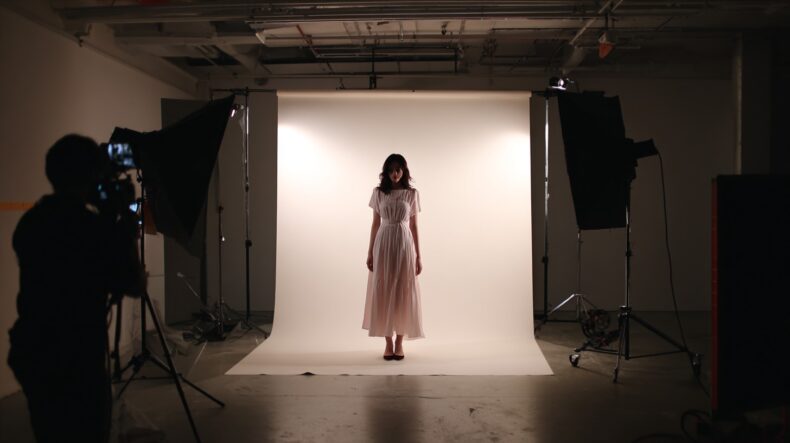
A backdrop instantly transforms a simple room into a professional workspace. White or light gray walls are perfect free solutions for product or portrait photography.
For those seeking premium yet reusable options, consider investing in a Gravity Backdrops professional canvas, hand-painted, non-reflective, and wrinkle-resistant backdrops trusted by renowned photographers worldwide.
Experimenting with color gels or RGB lights can also create dynamic effects for portraits and commercial shoots.
Backdrop tips:
- Use “car-size” seamless paper rolls (around 2.08 meters wide) for clean, wrinkle-free shots
- Paper offers a matte finish and prevents unwanted reflections
- Fabric is affordable but may need post-editing to fix wrinkles.
Mounting options:
- Use curtain rods or DIY PVC stands for a low-cost solution.
- Collapsible backdrop stands provide portability for photographers who work in multiple locations.
Lighting Essentials
Lighting determines the overall quality of an image. Natural light remains the most affordable option and is perfect for soft portraits and product photography.
Placing the subject near a window allows light to wrap naturally around the subject.
White sheets or foam boards can diffuse harsh sunlight, while black cloth or cardboard can block unwanted reflections.
Artificial lights provide more control and consistency. Continuous LED panels are beginner-friendly and help visualize the final look in real time.
Strobe lights, on the other hand, offer stronger output and are better for freezing motion.
DIY lighting setups can be surprisingly effective. Lamps with LED bulbs covered by white cloth create soft diffused light. Aluminum foil or foam boards act as inexpensive reflectors. Building simple modifiers encourages experimentation while keeping costs minimal.
Light Modifiers & Accessories
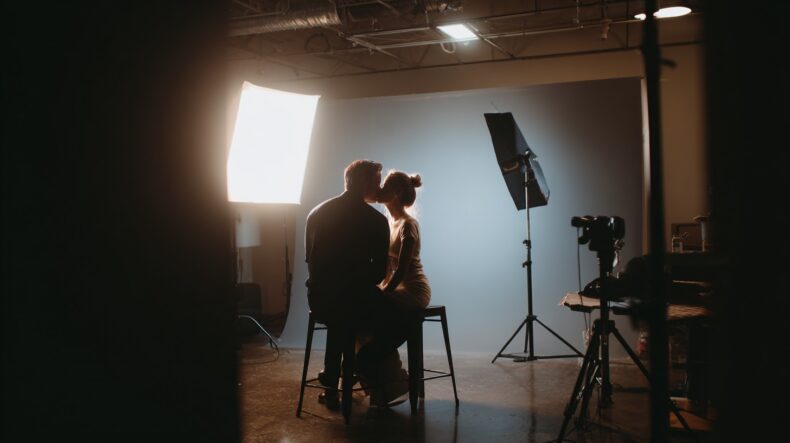
Modifiers shape light, control contrast, and improve image quality. Softboxes diffuse harsh light for flattering portraits, and can even be DIYed using fabric stretched over a lamp frame.
Octaboxes produce natural, rounded reflections in the eyes—ideal for portrait work. Umbrellas remain an affordable, versatile solution for broad light spread.
Creative photographers often craft their own beauty dishes using aluminum pans, inspired by techniques shared on Canva.
Reflectors and flags are crucial accessories:
- White poster boards or foil sheets reflect light efficiently.
- Black cardboard panels help block or sculpt light where needed.
Combining modifiers and reflectors gives full control over shadow depth and highlight intensity, allowing for professional-level lighting effects without high expenses.
Tripods, Stands & Tethering
Sharp, stable shots require a sturdy tripod. Investing in a reliable model, such as those recommended by Laura BC or brands like Manfrotto, ensures consistent framing and prevents motion blur.
Light stands should match the weight of your chosen lights to avoid accidents or unbalanced setups.
Budget options from Neewer perform well for lightweight LED panels or speedlights.
Tethering connects the camera directly to a computer, enabling real-time previews and focus checks. This practice helps correct exposure, framing, and composition instantly—crucial for product and portrait photographers seeking efficiency.
Sharp and stable shots depend heavily on the quality of support equipment used in a home studio. A tripod serves as the backbone of any setup, keeping the camera perfectly still and ensuring consistent framing across multiple shots.
Key considerations for tripods:
- Choose one made of aluminum or carbon fiber for sturdiness and light weight.
- Opt for a tripod with a ball head or fluid head for smooth rotation and angle adjustments.
- Ensure it can support your camera’s weight, especially when using heavier lenses.
- A quick-release plate system can make setup and repositioning faster during shoots.
Light stands are equally important for maintaining consistent lighting across sessions.
An unsteady or weak stand can lead to broken equipment or inconsistent light direction.
Budget-friendly brands such as Neewer provide dependable stands that can handle LED panels, continuous lights, or small strobes.
Tips for light stands:
- Match stand capacity with the weight of your light source.
- Use sandbags or counterweights to prevent tipping, especially in tight spaces.
- Choose adjustable stands that reach different heights for flexibility in lighting angles.
- Consider collapsible stands for easy storage and transport.
Tethering has become a standard practice among professional photographers, as it creates a direct connection between the camera and a computer.
Additional Must-Haves
A few inexpensive tools can make any studio workflow smoother. A small stool or table is useful for seating models or placing equipment like laptops and reflectors.
Clamps and clips hold backdrops or fabrics firmly in place, ensuring a professional finish.
A remote shutter release allows hands-free operation, essential for self-portraits or minimizing camera shake.
Adding RGB lights brings versatility for creative, moody effects, especially when producing video content or artistic photography.
Small touches such as these significantly improve comfort and shooting precision, allowing creators to focus on their craft.
Budget Tips & Final Thoughts
Building a home studio doesn’t require luxury equipment—just strategy and patience. Starting with one backdrop, one light source, and a clear concept is enough.
Gradual upgrades allow photographers to grow naturally with their work and budget.
A personal studio should function not only as a workspace but also as a creative lab where experimentation leads to skill improvement and style refinement.
Summary

Creating a professional photo studio at home is entirely achievable with thoughtful planning, creativity, and gradual investment.
A clear vision, combined with practical solutions like DIY lighting, reusable fabrics, and reliable tools, makes professional photography accessible to anyone on a budget.


